I've been painting as usual. I just finished taking a creative class called : Black and White, cells and planets. It was fun even though black and white isn`t really my thing!
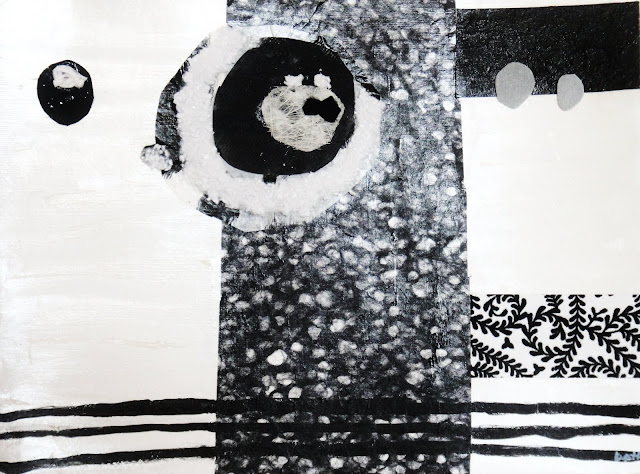
These two next mix-media paintings are my favorite ones. The first is called "Puckered up" because it reminds me of a little puckered up face. Maybe after eating a really sour candy? I used string gel to create those smooth and unbroken white circle lines. Also, I used several different types of fabric and paper to create the circles. The objective was to create texture. This painting was also just an exercise, but it turned out great!
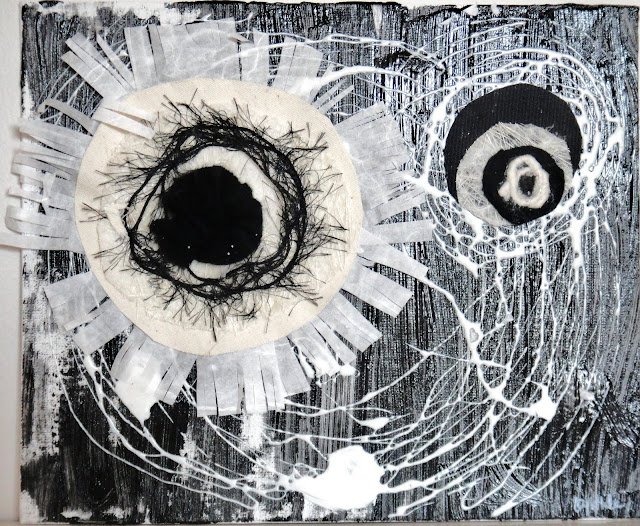 |
| Puckered up |
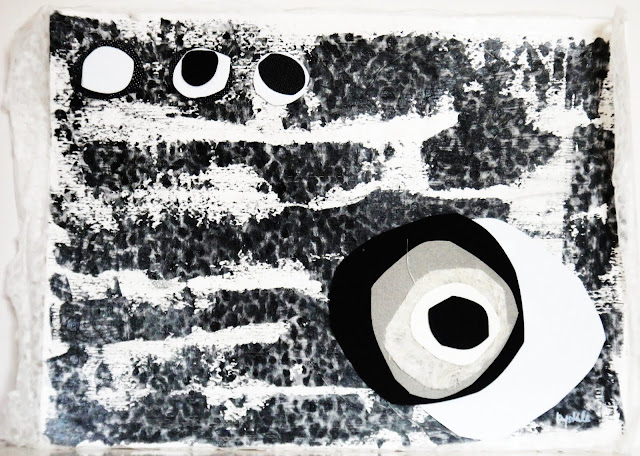
This next one was created over a previous exercise that I had done when exploring textures and materials. I really didn't like the exercises end result. I also had a lot of leftovers from cutting so many circles out of all these papers I used for another painting. I figured that one ugly exercise + a lot of left over paper could = something interesting. Indeed, it turns out that this is one of my favorite mix-media paintings ever!
I really like how things from the exploration/exercise I did peer out from under all that paper. I also like it because it's really 3D. I call it "Squares and Cells".
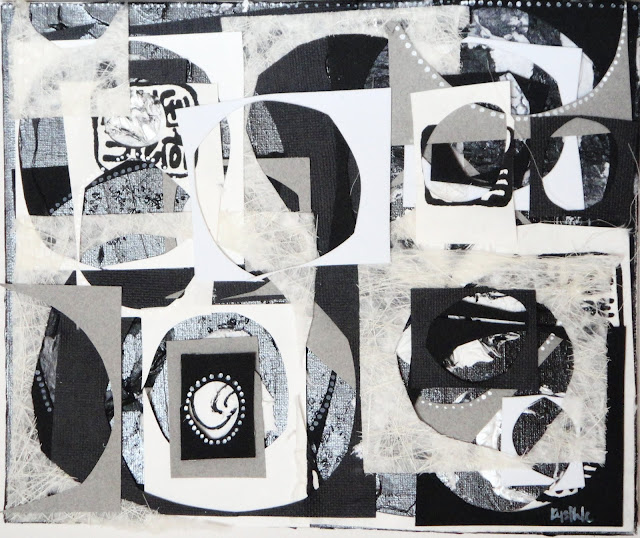 |
| Squares and cells |
This next one is called "Comet", and if you haven't guessed why, it's because of the frilly tail that is located under the circle. Now you might have a hard time figuring out the shape of this one, it's because the circle does indeed poke out of the canvas.
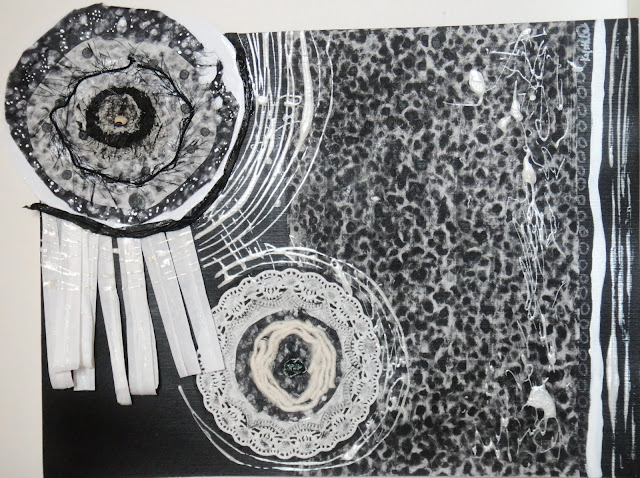 |
| Comet |
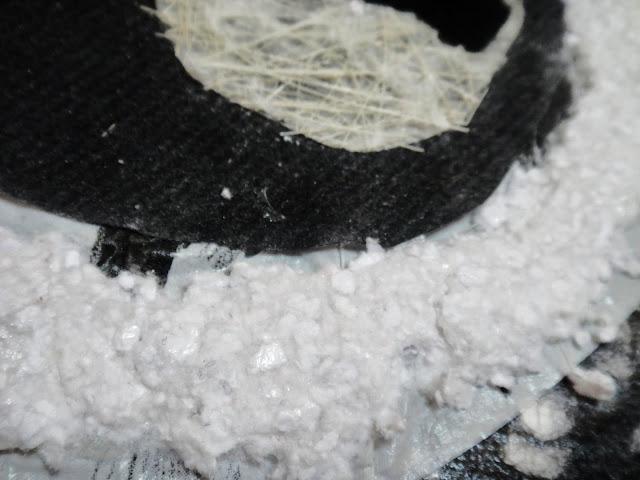
The closup reveals the materials used: some frilly ribon, fiber paper, some black and white lace papers, and black and white paper ribon. I also used the string gel with some pearl colored acrylic paint over the white paper ribbon.
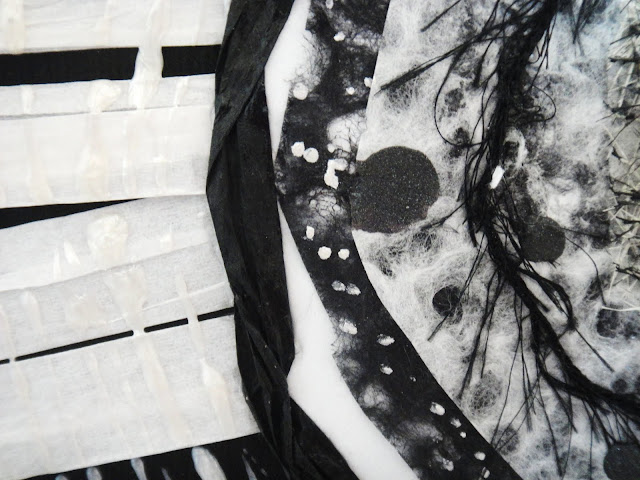 |
| Comet closeup |
This next one is called "The sheep". It"s pretty self-explanotory.
 |
| The Sheep |
I put this closeup so that you may see the material used. It's really paper maché material that hasen't been soaked in water. To make it stay put, I put some acrylic medium over it.
 |
| The sheep closeup |
This painting is called "Three little moons", because it reminds me of a planet with three moons in the sky. An interesting tidbit about his painting is that I intentionally left some lace paper peer out from the edges.
 |
| Three little moons |
And the last painting is called "Three little cells". I used so many different kinds of paper to do the cells, which is what makes it neat.
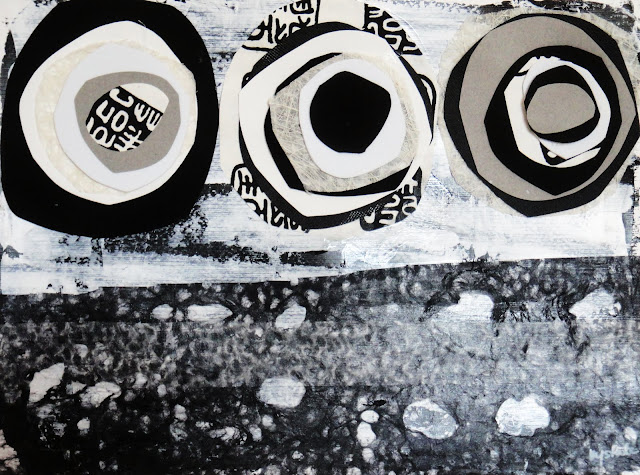 |
| Three little cells |
Hope you enjoyed!
Krysthle Poitras

Black and white: cells and planets


